I really haven't been fitting much sewing into my schedule. We are busy with the bees, granddaughters, gardening, canning, and working at my 'pay money' job. This fall I'm sure sewing will begin again. Some ideas I would like to make for the girls are shown below. They still love dress-up. And these are so pretty.
I really can sew more than this but I find that I sew what I need. I started sewing my own under garments a year ago See here And the truth is I like them better than any I've purchased over the years. They can be made to individual form.
So once again this is my sewing challenge garment. I do plan to branch out a bit in February. I'm thinking a fun spring skirt would be perfect next month.
Cotton cut on the bias. I line with cotton too.
Very comfortable and wears well.
Robin
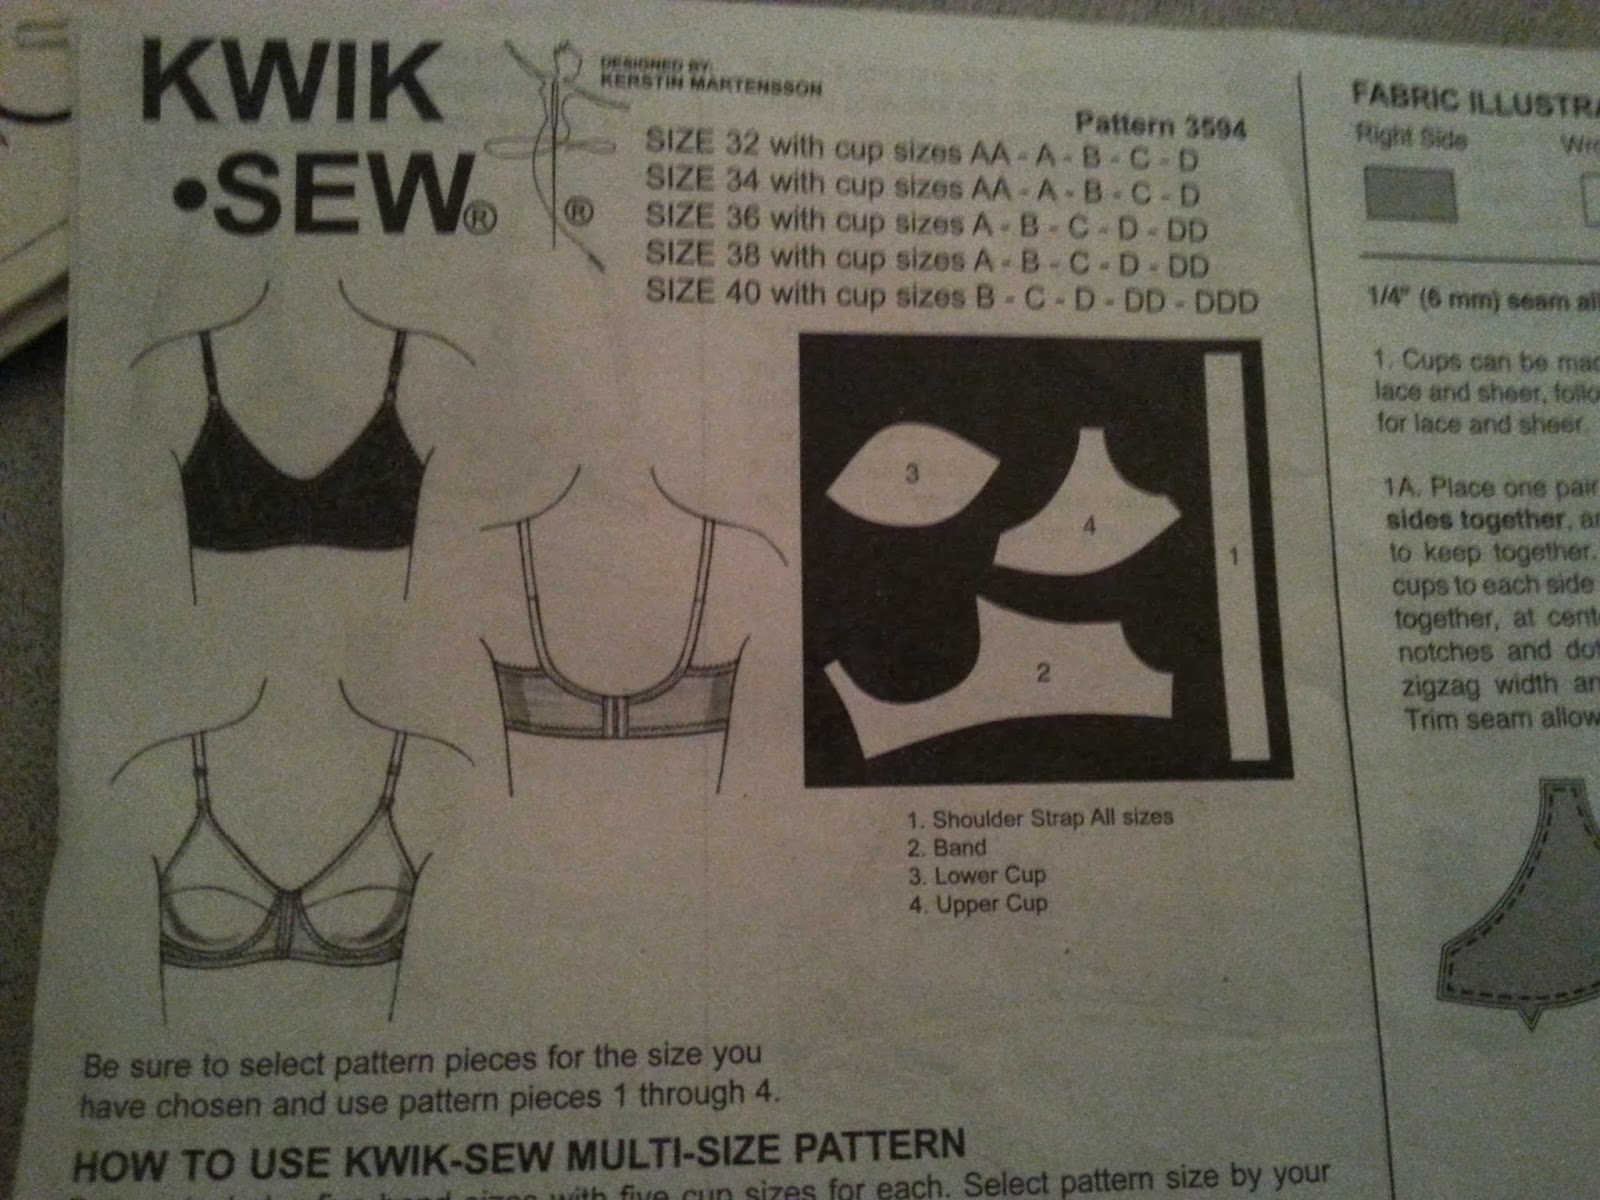
Judy, this is the picture of the four pieces. It really is a basic pattern. I made a change so I could make a button closure instead of the hook and eye. I just prefer that. If you ever decide to make one and want to do the button closure let me know I would be happy to send you my extension pattern.
As you can see it really is just a piece of paper to extend the side a bit to give me room for buttons and button holes.
My baby sister is a grandma! The pictures have been flying our way via text messaging. So even though we are on the opposite side of the country we have seen sweet pictures of this little one.
Well what's an aunt to do - head to the sewing machine with some fun flannel. I love large double sided receiving blankets. I made them for our granddaughters, have made them for shower gifts and now made a couple more.
1 1/4 yard of 45 inch wide fabric per each side makes a nice square receiving blanket.
If you buy 1 1/2 yards you'll have enough to make a matching burp cloth.
You need 2 contrasting pieces for each blanket.
Cut your fabric so it is the same size. A cutting board and rotary cutter works great for this.
Put right sides together and stitch around the outside - remember to leave 6 to 8 inches open so you can turn the blanket right side out.
Press
Then I like to do a decorative stitch around the outside edge. It finishes it off and closes the turning opening up all in one endeavor.
A good twirler. My girls love twirly skirts/dresses. This is a good one. ;-)
The pattern was a bit different as it had a zip in the side. But went together well.
Again my love of French seams.
The bodice wasn't fully lined just interfacing/facing.
No sweaters in the desired colors were found. I'm sure if we would have driven the four hours to the 'big city' we could have found one but the jean jacket looks darling don't you think.
Plus it will be paired with many other fun items in granddaughter #2's closet.
So I think birthday dresses are done until June. I have had fun making every one of them and thankfully the girls have loved them.
Hope you are having a wonderful January and getting some sweet sewing done too.
This just looked like spring to me and even though it's January soon it will be spring so our January birthday girl is getting a spring dress. Hope she likes it!!
The pattern goes from size 3 to size 8. I traced off the size 6 for this dress. Do others do that too? At the cost of patters I try to buy multi-sized and then trace the size needed. Our girls range from size 2 up to 6. This seems to be the way to stretch my dollars a bit.
I am done down to the hem. I am taking it with me tomorrow when we head up to their house, so yes she will see it before her day, but she is growing by leaps and bounds so need to have her try it on for the hem.
I poured over the materials at Hancock Fabric - looking for just the right material.
Loved the daisies.. I was so pleased to find a fun contrast material too.
I've been using cotton for all the girls dresses, PJ's, etc. I love cotton. It washes beautifully and if you take it out of the dryer promptly it needs little or no ironing.
Plus it feels good!
I'm hoping I can find a periwinkle blue or turquoise sweater to go with the dress to make it usable now while it's still winter.
Hope you are staying warm wherever you are and getting some fun sewing done as well.
Allow me to step back in time about 34 years. I was a newlywed. Christmas was coming so I decided to make flannel nightgowns for the little girls in my new extended family. They were darling. One was mint green and the other a pale blue. Lace trim and ruffles were stitched and pressed. Sweet, sweet nightgowns. Well at least on the outside. Eek. (I'm sure you know what's coming...)
Christmas morn the presents were opened and the sweet nightgowns were unwrapped and the little girls ran over to their mom to show them off. Well the mom turned them inside out to see how they were made. Her response was "You didn't finish the seams." Oh dear, I was embarrassed and even a little hurt that she chose to find fault instead of delight. But I learned a very good lesson. What a garment looks like on the inside is just as important as on the outside.
So now I try to make sure I finish the seams. I am working on flannel pajamas for our granddaughters. And although I know neither of my sweet daughters-in-love would embarrass me by checking my work I want the PJ's to be darling and well made.
I am on my first top and it has been a hoot. The first seam I did a French seam as that is one of my favorites - well the flannel is thick so it seemed a bit bulky. So the next seams, shoulders, I decided to do a 'turned and stitched' finish. That worked well but when I went to the next seam there was gathering so I did an straight seam, zigzag and pinked the edges - okay by now I'm feeling silly that I have three seams and they are all different finishes... What to do? I called my mom. We laughed about my progress so far. Mom had a great idea - seam binding. Perfect but I want it soft not scratchy. The answer make my own seam binding from the same flannel.
My plan is to go over the pinked seam with seam binding - does it need it? No, but it will look more uniform with the rest of the top. Happy sewing - and after 34 years I'm still learning!! :-)
mark the lines on the bias I did 1.5 inches wide
line up and sew into a tube
Cut continuously to the end
My strip ready to be ironed
This is a great little tool I bought at Nancy's Notions. It folds the seam binding and you just follow it with an iron.
7 yards of matching flannel seam binding
I didn't use the tool she shows. Just my normal cutting guide - it worked great.
Just for fun I'm adding the pictures of the different seams so far...
At least my mom will get giggle.
Outside of PJ top so far
Pattern called for seam binding at neck to finish the raw edge.
The French seam - as you can see it's bulky
turned and stitched shoulder seams
Back bodice stitched to gathered back - straight stitched, zigzagged and then pinked the edge...
Good grief, Charlie Brown!
We are going to the store today. I think I will stop and buy one more yard of this fabric and start again. I can just save this for reference of different seam finishes.


.JPG)


.JPG)
.JPG)
.JPG)


.JPG)


